
Personal documentation for my homelab infrastructure. This documentation contains a consolidated overview of infrastructure, network topology and links to installation scripts.
Hardware#
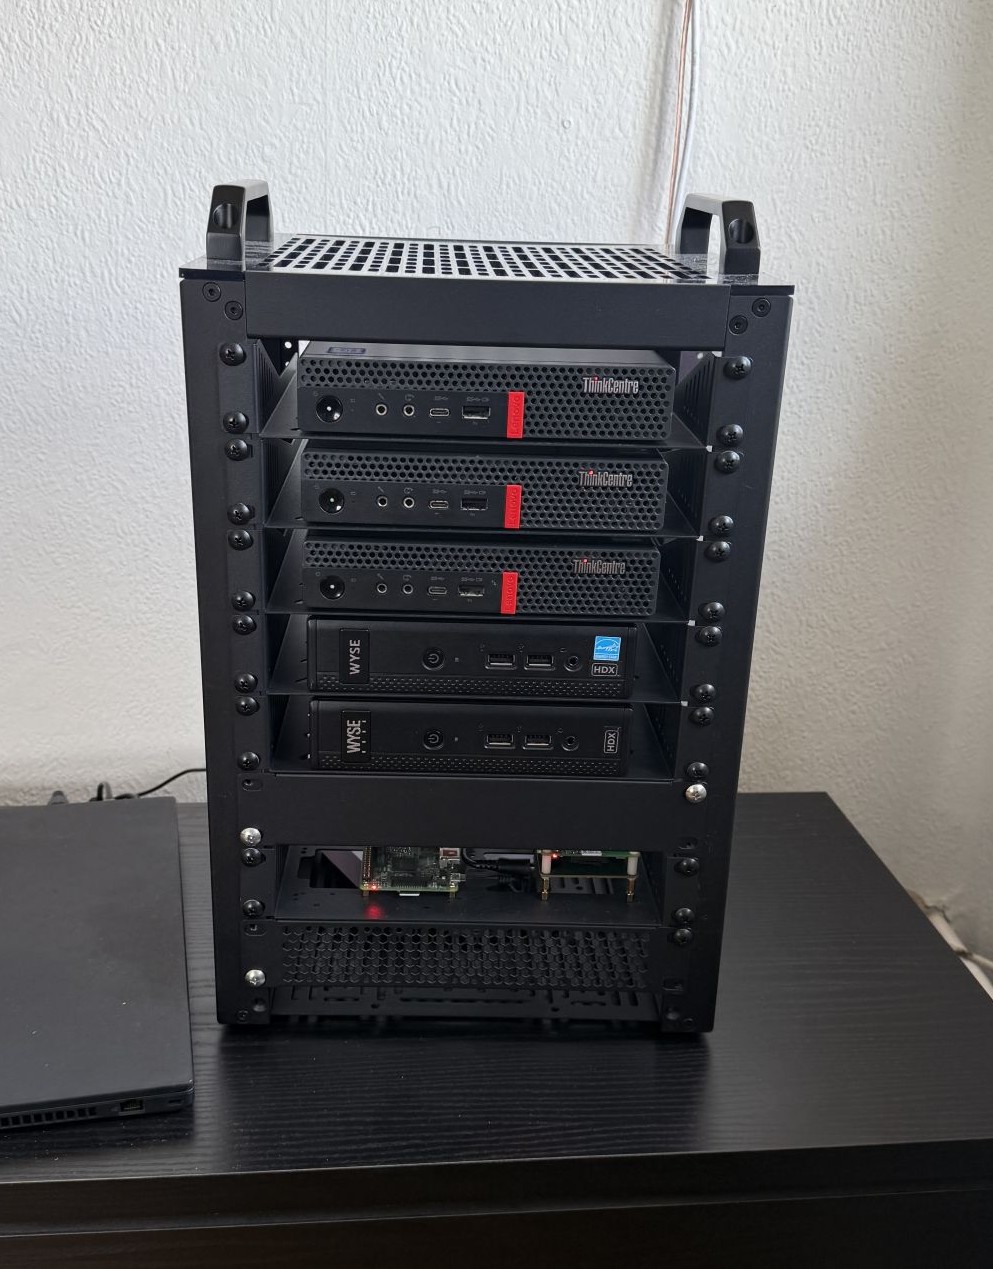
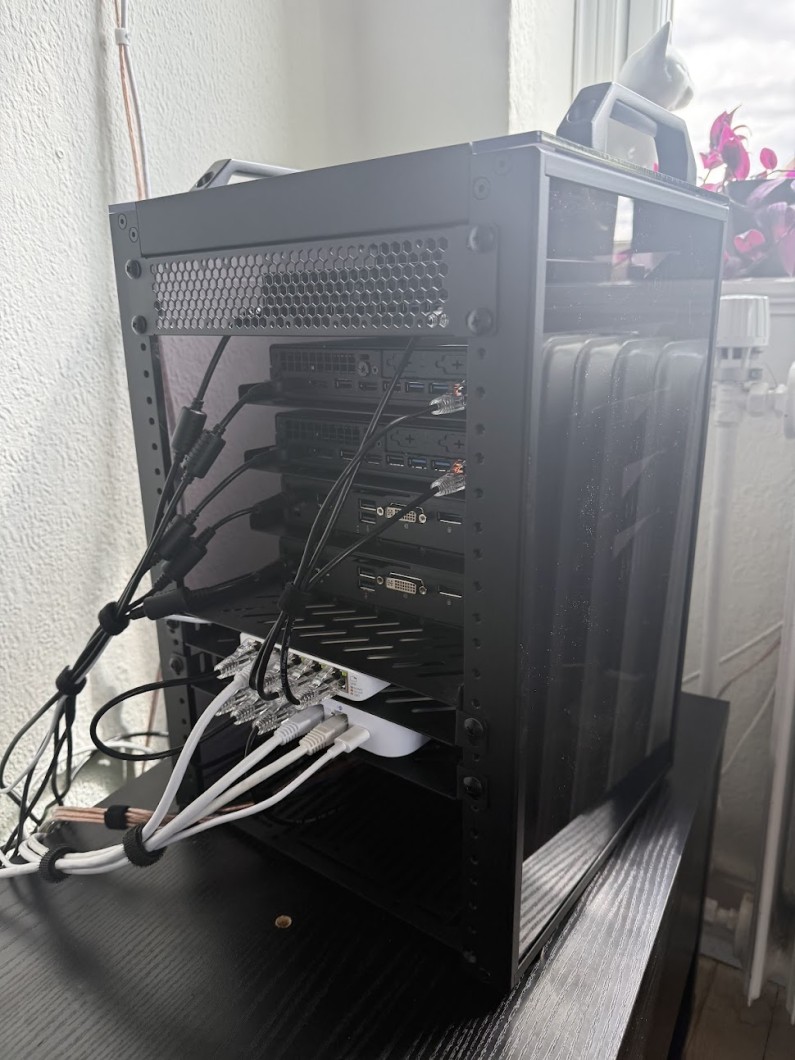
- GeeekPi DeskPi RackMate T1
- Lenovo ThinkCentre M920x, i5-9400T, 16 GB RAM, 256 GB NVMe (lv-426)
- Lenovo ThinkCentre M920x, i5-8500, 16 GB RAM, 256 GB NVMe (lv-223)
- Lenovo ThinkCentre M920x, i3-8100, 16 GB RAM, 256 GB NVMe (lv-178)
- 2x Dell Wyse ThinClient (currently not in use)
- Raspberry Pi 3B + HiFiBerry AMP+
- Raspberry Pi 2B
- Cloud Gateway Ultra
- USW Flex Mini
- U7 Lite AP
Network#
Gateway/router/firewall:
192.168.1.1
| Segment | Hostname | IP / Port | Function / Type |
|---|---|---|---|
| VLAN 1 | ha.deef.dk | 192.168.1.103:8123 | Home Assistant |
| VLAN 1 | lv-426.deef.dk | 192.168.1.10:8006 | Proxmox Initial Node |
| VLAN 1 | lv-223.deef.dk | 192.168.1.11:8006 | Proxmox Node |
| VLAN 1 | lv-178.deef.dk | 192.168.1.12:8006 | Proxmox Node |
| VLAN 1 | port.deef.dk | 192.168.1.132:9443 | Docker Portainer |
| VLAN 1 | moode.deef.dk | 192.168.1.248:80 | Moode Audio |
| VLAN 1 | nginx.deef.dk | 192.168.1.204:81 | Proxy Manager |
| VLAN 1 | pihole.deef.dk | 192.168.1.127:80 | Ad Blocking |
| VLAN 1 | pihole2.deef.dk | 192.168.1.130:80 | Ad Blocking |
| VLAN 10 | - | 192.168.10.204 | IoT Device |
| VLAN 10 | - | 192.168.10.104 | IoT Device |
| VLAN 10 | - | 192.168.10.44 | IoT Device |
Pi-hole#
I’ve installed Pi-hole on two devices. By running two instances, I ensure that ad-blocking and local DNS resolution remain active even if one device goes offline or restarts.
For the Raspberry Pi, install with following commands:
git clone --depth 1 https://github.com/pi-hole/pi-hole.git Pi-hole
cd "Pi-hole/automated install/"
sudo bash basic-install.sh
Alternatively, you can install using curl:
curl -sSL https://install.pi-hole.net | bashFor the Proxmox node, install with Proxmox community helper script below.
bash -c "$(curl -fsSL https://raw.githubusercontent.com/community-scripts/ProxmoxVE/main/ct/pihole.sh)"192.168.1.127 and 192.168.1.130 as the primary and secondary DNS servers on your router.Adding the local DNS records to both pi-holes instances.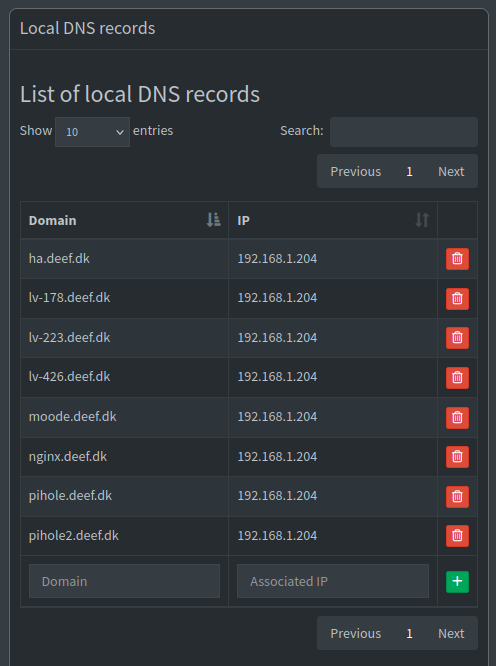
Notice the local DNS records all point to the Nginx Proxy Manager IP-address, which will handle the requests.
Having to maintain multiple pi-hole instances can be cumbersome, so I setup nebula-sync to sync the pi-hole configuration across both devices.
On both pi-hole instances, configure an app password in the web interface and enable webserver.api.app_sudo.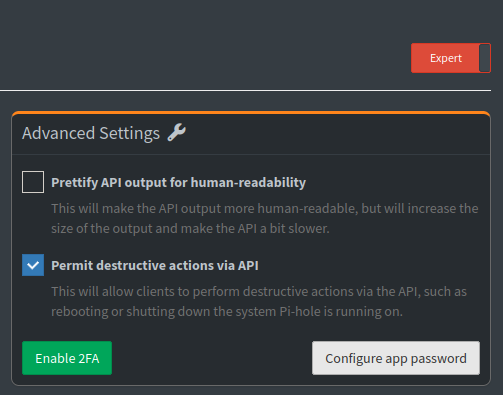
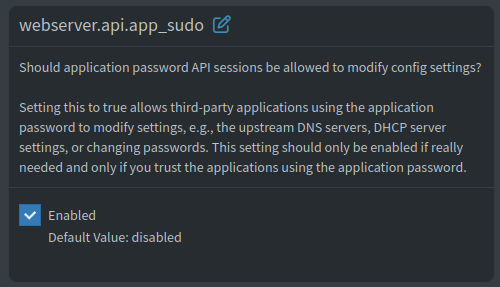
If you don’t see the option, make sure you enable Expert Mode.
In Portainer, add a new stack. Give it a name and paste the following YAML configuration.
---
services:
  nebula-sync:
    image: ghcr.io/lovelaze/nebula-sync:latest
    container_name: nebula-sync
    environment:
    - PRIMARY=https://pihole.deef.dk|Your App Password
    - REPLICAS=https://pihole2.deef.dk|Your App Password
    - FULL_SYNC=true
    - RUN_GRAVITY=true
    - CRON=0 * * * *
Nginx Proxy Manager#
Install with Proxmox community helper script below.
bash -c "$(curl -fsSL https://raw.githubusercontent.com/community-scripts/ProxmoxVE/main/ct/nginxproxymanager.sh)"Setting up the DNS records on Cloudflare.
;Type    Name          Content          Proxy
A        deef.dk       192.168.1.204    DNS Only - reverse IP
CNAME    *deef.dk      deef.dk          DNS Only
Configuring Let’s Encrypt SSL Certificate: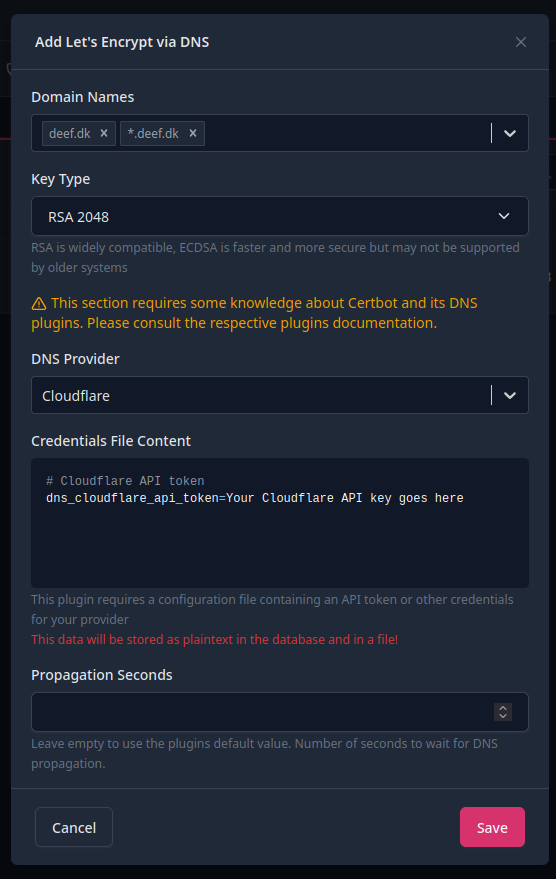
Start adding your first Proxy Hosts.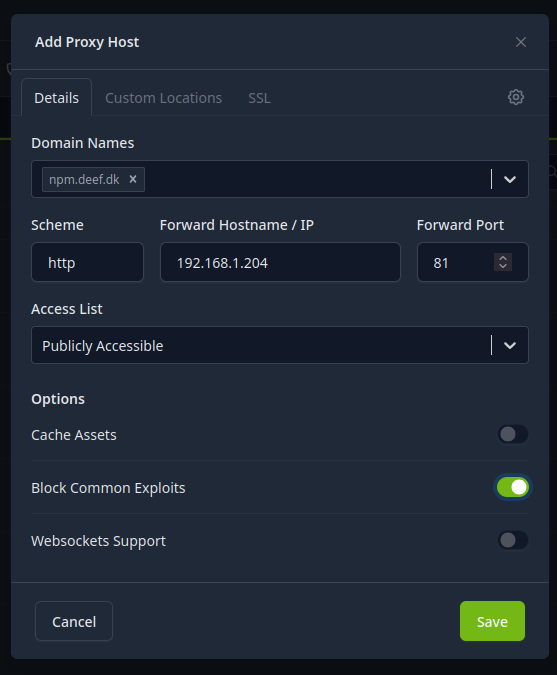
Sometimes depending on the service you’re proxying, you may need to play around with the settings.
For example, Home Assistant requires you to select WebSocket Support. And sometimes the scheme needs to be set to http instead of https.
Select the SSL certificate you previously created.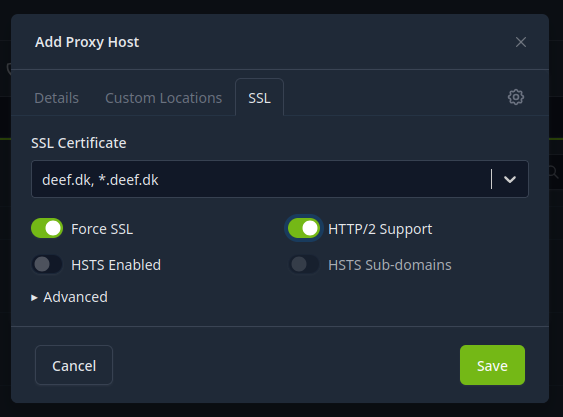
You should now be able to access your services without using the IP-addresses. No more site not secure warnings and easy rememberable URLs like ha.deef.dk.
Everything is set up to run locally. If you do a nslookup on ha.deef.dk, you will only see the local IP-address, not the external IP-address. Even if you’re trying to access the service from outside your local network.
Cloudflare acts as a reverse proxy and handles TLS termination. If you don’t have a domain, you can use a free service like DuckDNS.
Home Assistant#
HA is installed as a VM on Proxmox with this helper script.
bash -c "$(curl -fsSL https://raw.githubusercontent.com/community-scripts/ProxmoxVE/main/vm/haos-vm.sh"For Home Assistant to work with reverse proxy, you need to add the following to the configuration.yaml file.
# configuration.yaml
http:
  use_x_forwarded_for: true
  trusted_proxies:
    - 192.168.1.204 # <- Your reverse proxy IP here
Resources#
- Proxmox VE
- Docker
- Docker Proxmox Helper Script
- Home Assistant
- HA Proxmox Helper Script
- nebula-sync
- Nginx Proxy Manager
- NPM Proxmox Helper Script
- Pi-hole
- Pi-hole Proxmox Helper Script
Conclusion#
This post got a bit long, but having separated posts about my homelab just didn’t make sense, so I decided to put everything in this single post. I don’t always write into detail, but I hope you find at least some of it useful.
I will continue to update this post as I make changes to my homelab. As we all know, the homelabbing never finishes. 😅